Figma
Customization & Theming: Figma
While CSS Custom Properties make styling components straightforward in code, Figma currently lacks similar comprehensive theming capabilities. These guidelines provide strategies for customizing Cosmos web components in Figma. We recommend that designers use Cosmos components whenever possible and style them through local instance overwrites or wrapped Cosmos components to improve reusability.
These strategies enable designers to receive updates from the Cosmos Web Components library after applying customizations, stay in parity with code integrations, and streamline hand-offs across the organization.
Instance Overwrites
This strategy is ideal for smaller projects such as landing pages, where you may use a customized component in one or a few places, but do not have to worry about re-usability.
Customization in Design
Start by selecting a start with a Cosmos component - in this example, the Button. After adding it from the Asset panel, you can locally overwrite any allowed properties to match your design language.
Engineering Handover
Engineers can compare the changes between the customization and the Cosmos Component in Dev Mode using the "Compare Changes" option in the Inspect Panel.
The Modal's left side lets you navigate through the layer structure, highlighting "Edited" component parts. The right side displays a Code Diff showing the design changes.
ℹ️ Flex layout values often appear as changes in code despite not being intentional design changes. Always verify changes by comparing them with the expected visual outcome.
Local Component Wrappers
Instance overwrites become cumbersome to manage for complex and/or long-term projects where themed component maintenance and reusability matter. In large-scale projects, designers may handle thousands of instances—without component-level customization, these become time-consuming to update and error-prone.
Customization in Design
First, identify the Cosmos component you want to customize and drag it in from the Asset Panel. For this example, we've selected the Badge.
Begin by identifying the variants needed for your project. Add these variants to your canvas, then select all variants and combine them as variants of a single component using the 'create component set' action.
Next, rename your component cmd+r and create the properties for your variant set. While property naming is flexible, it's best to align closely with Cosmos property names to help engineers understand and connect the relationship between properties across the local and wrapped component.
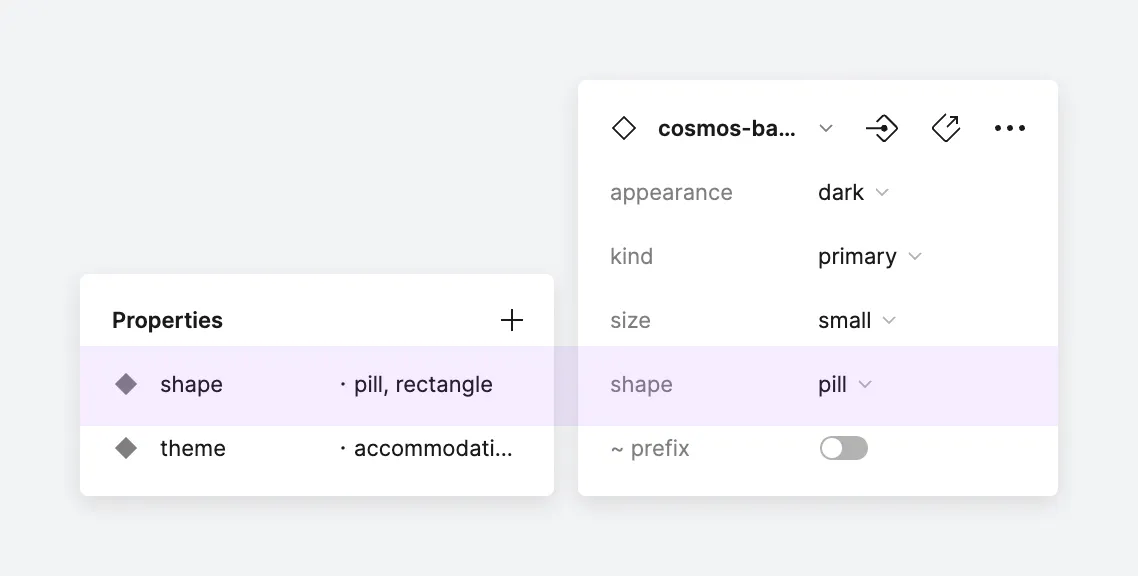
After setting up the component structure, make your desired visual changes by overwriting properties in the wrapped Cosmos component instances.
Engineering Handover
Since the local component API may differ from the Cosmos Component API, start by using the Component Playground to inspect the proposed properties.
After component inspection, inspect the Code Diff for each variant by selecting "Compare Changes" in the Inspect Panel. Remember to perform inspection at the component level, not the instance level as described in instance overwrites.